Hello hungry peoples,
I have been in deep philosophical ruminations. Why are we here? What is the meaning of it all, and lastly, what is my cake decorating ethos? Guess which one I spent the most time on. This month is a month of birthdays in my house; my hubby’s, my niece’s and finally my son’s, all in quick succession. This year my sister was struggling with what to do for her daughter’s cake. Possibly like an ill informed fool I thought ‘Sure…I can decorate a cake….two tier….no problem. How hard can it be?” I have never EVER produced a beautifully decorated cake, let alone one that requires engineering. Life just got interesting.

Step 2: The Icing
I planned to use an American Buttercream because it is delicious and pretty easy. Sure I won’t get the perfect finish that fondant produces but I think it will have a more relaxed tasty feel. Due to poor planning I used up all of my cocoa in the mud cake. Luckily the BBC Good Food Chocolate Buttercream uses real melted chocolate, which I have in spades. I did decide to go with a milk chocolate, rather than dark. Dark chocolate may produce a better result. I thought the colour was a bit insipid. Automatically I doubled all of the amounts. Always better to have too much icing than not enough. It was lucky I did as I still ran out.
Step 3: The Decorations
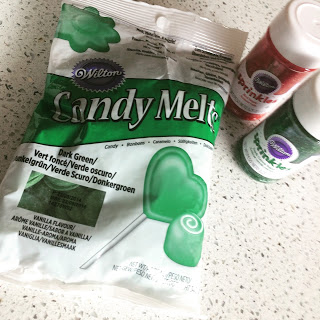
I am making chocolate roses and leaves. I ordered molds online as I figure they are pretty generic and I will be able to reuse them. I was able to get green chocolate melts for the leaves so the colour is sorted. I also have some green sugar to play around with. For the roses, I want them to be red but I couldn’t get red chocolate melts. I do have some red sugar so I am going to play around with colouring some white chocolate. Turns out the gel icing colours I do have contain water. In case you don’t know, water and chocolate should never be mixed.
Once the chocolate was liquid I set about filling the molds. Using a spoon to fill the leave molds was going poorly. They were just too delicate. Instead I spooned the melted chocolate into a sandwich bag and snipped a corner off. This was much more effective but next time I am going to wear gloves. The hot chocolate did burninate quite a bit. As you can see from the photos some mold fillings went better than others.

Once the white chocolate was melted I put copious red sugar into the white chocolate, hoping the sugar would dissolve and dye the chocolate. It turns out this sugar could survive a nuclear holocaust. It refused to dissolve. Instead I ended up with red speckled white chocolate, not altogether a bad thing. I totally meant to do that. Luckily I will have the right coloured chocolate for my niece’s cake.
As this chocolate had been sitting in the double boiler a bit longer, some of the chocolate started getting dry. I think it was starting to burn. The double boiler method really didn’t really work out how I wanted it to. Because there was some dry coagulated chocolate in the mix, the sandwich bag tip got glugged up when I tried to repeat my filling method. This ultimately exploded due to the pressure build up. Whoops! I tried to spoon the remaining chocolate into the molds and crossed my fingers. Next time I am definitely just using the microwave. Learn from my mistakes people! The whole tray went into the fridge for 15 minutes. Research on the interwebs suggest that more than this is not good for the chocolate, giving it a faded ‘old’ chocolate look . Next demolding!
This was freakin scary! I expected a very high failure rate, especially as I haven’t made chocolate molds since I was 14 in a high school chocolate making class. Amazingly the leaves and flowers worked pretty well. The slightly burnt chocolate didn’t set properly but the flowers looked good despite this. In future JUST DON’T USE IT! Sigh.
The dusting of red sugar looked quite pretty on the roses but didn’t do anything for the leaves due to the darker coloured chocolate.
Step 4: Bringing it all together
I bought some tools for this occasion. One of my splurges was a proper rotating cake platform. I put some buttercream onto the base to help the cake stick. I was probably a bit too stingy here and should have added more, as the cake moved around a bit. I used a bread knife to chop the bulbous top part of the cake off and put the cake on the platform cut side down to get a more even cake top. This was pretty successful but I didn’t cut enough of the top off, creating gutters around the base of my cake. Doh!
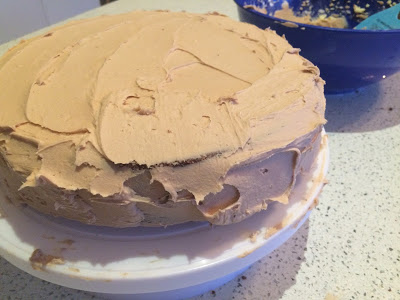
Next I used some silicon hands to add the first layer of icing – the crumb coat. I then put the cake in the fridge for 20 minutes. According to experts this helps the icing set and gives a cleaner finish when you do the second coat.
I then put a second coat of icing on the cake. This took aaaaaaaages as I was trying to get it as neat and finished looking as possible. It was kinda meditative though. I filled up a piping bag with icing, using a star shaped nozzle. I ran a line of icing along the cake base, trying to cover my ‘gutters’. I also tried to do icing rosettes around the top edge as they looked a bit rough. I really struggled to get them all even. I definitely need to practice this.
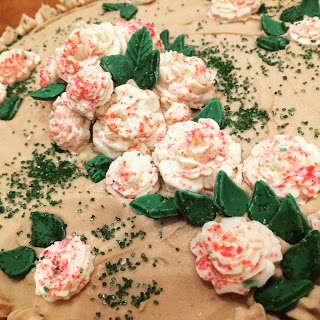
I decided to try to make the chocolate flowers into a bouquet that started in the center and trailed over the edge. I managed to get some nice height bunching the flowers together but I think this where my artistic vision started to fray a bit. I just couldn’t work out where to place things. I kinda gave up, threw the rest on and sprinkled some green sugar on top. Not entirely satisfactory but fairly respectable. I still can’t decide on whether I love or hate it. I guess if it was love I would probably know.
The Final Assessment
Let’s start with the cake. It ended up being a good chocolate cake but not muddy enough to be a mud cake. The search for a good recipe continues. If anyone has the Cheesecake Shop recipe, I desperately want it!
The buttercream came together quite nicely but I have some serious concerns about trying to make a white buttercream. The initial mix had a very yellow colour to it. I also didn’t like the flavour much. I’m thinking of trying something else for my niece’s cake.
The chocolate decorations came out surprisingly well. I did use a few different molds for the leaves and I struggled to put them all together in a cohesive manner. I might stick to one type in future.
I think my main dissatisfaction with the design was that I did too much and didn’t have a clear enough plan. I started out doing some traditional borders on the cake edges to hide a multitude of sins and I think it came out a bit grandma-ish. I’m going to try to hold back more in future and have some cleaner lines. So what did the man of the day have to say about his cake? It was tasty but much too girly. Fair call!
